One of the most useful extra activities for children at Whitefriars Junior School was the Safe Cycle Training - Cycling Proficiency as it used to be called. Children had to take their bikes into school where they were checked to ensure they were all in order before having practical training in how to ride safely on the roads. This was done on the playground at the school. The children also had to complete a work book, which is reproduced here.
 |
|
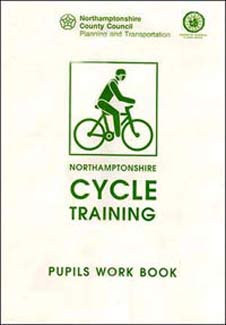
Cover of the Safe Cycle Training work book for pupils
|
A Message for you
Hello, welcome to the Northamptonshire County Council Cycle Training Scheme.
In this book you will find questions all about safe cycling. If you do not know the answers, your Highway Code For Young Road Users and Safe Cycling booklet will help you. If you are unsure about anything ask your teacher or instructor.
When you have finished the course, it is just the start of your safe cycling career. You will have some knowledge but it is important to increase this and develop your practical skills.
Your safety is up to you – learn all you can now and always use it. Do not be tempted to do what you know is wrong. Always be considerate to other road users and watch out for the mistakes they make which might put you in danger.
Safe cycling
Graham Feest
County Road Safety Officer
 |
|
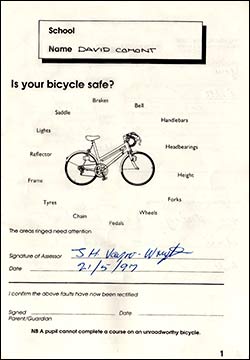
Result of the safety check of David's bicycle
|
|
Is your bicycle safe?
|
|
|
Brakes
|
Pedals
|
The areas ringed need attention
|
Bell
|
Chain
|
Signature of Assessor J H Vayro-Wright
|
Handlebars
|
Tyres
|
Date 21/5/97
|
Headbearings
|
Frame
|
I confirm the above has now been rectified
|
Height
|
Reflector
|
|
Forks
|
Lights
|
Signed___________
|
Wheels
|
Saddle
|
Date_____________
|
 |
|
|
 |
|
Completed pages from David's Cycle Training work book
|
|
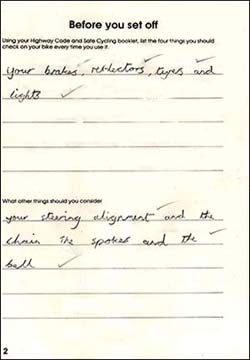
| Before You Set Off |
|
|
Q Using your Highway Code and Safe Cycling Booklet, list the four things you should check on your bike every time you use it?
|
|
A Your brakes, reflectors, tyres and lights
|
|
|
|
Q What other things should you consider?
|
|
A Your steering alignment and the chain, the spokes and the bell
|
|
|
|
|
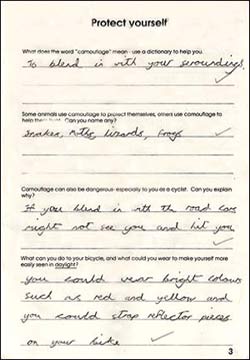
Protect Yourself
|
|
| Q What does the word “camouflage” mean? – use a dictionary to help you |
A To blend in with your surroundings
|
|
| Q Some animals use camouflage to protect themselves, others use camouflage to help them hunt. Can you name any? |
|
A Snakes, moths, lizards, frogs
|
|
Q Camouflage can be dangerous, especially to you as a cyclist. Can you explain why?
|
|
A If you blend in with the road, cars might not see you and hit you.
|
|
Q What can you do to your bicycle, and what could you wear to make yourself more easily seen in daylight?
|
|
A You could wear bright colours such as red and yellow and you could strap reflector pieces on your bike
|
|
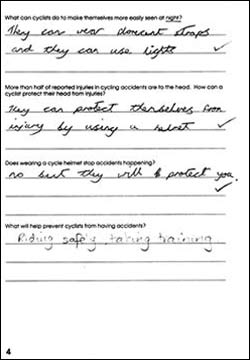
Q What can cyclists do to make themselves more easily seen at night?
|
|
A They can wear florescent straps and they can use lights
|
|
Q More than half of reported injuries in cycling accidents are to the head. How can a cyclist protect their head from injuries?
|
|
A They can protect themselves from injury by using a helmet
|
|
Q Does wearing a cycle helmet stop accidents happening?
|
|
A No but they will protect you
|
|
Q What will help prevent cyclists from having accidents?
|
|
A Riding safely, taking training
|
Road Signs and Markings
By using your Highway Code for Young Road Users
Underline the correct meaning of the road markings
|
A
|
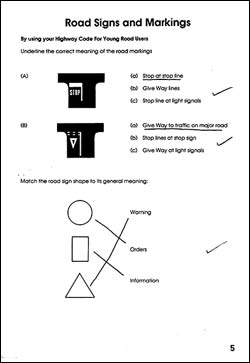 |
B
|
|
a Stop at stop line
|
a Give way to traffic on major road
|
|
b Give way line
|
b Stop lines at stop sign
|
|
c Stop line at light signals
|
c Give way at light signals
|
|
|
|
Match the road sign shape to its general meaning |
|
Warning
|
|
Orders
|
|
Information
|
|
|
|
Page from the work book about road signs and markings
|
|
Cycle Paths/Routes
Colour in each sign and underline the correct meaning
|
List of Colours
|
Signs
|
Meanings
|
|
Red edge
|
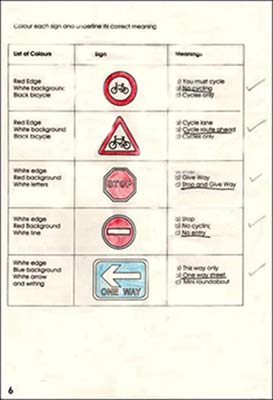 |
You must cycle
|
|
White background
|
No cycling
|
|
Black bicycle
|
Cycles only
|
|
Red edge
|
Cycle lane
|
|
White background
|
Cycle route ahead
|
|
Black bicycle
|
Cycles only
|
|
White edge
|
Stop
|
|
Red background
|
Give way
|
|
White letters
|
Stop and give way
|
|
White edge
|
Stop
|
|
Red background
|
No cycling
|
|
White line
|
No entry
|
|
White edge
|
This way only
|
|
Blue background
|
One way street
|
|
White arrow and writing
|
Mini roundabout
|
|
|
Another page from the work book about road signs and markings
|
Here are three different signs for cyclists
Colour them in correctly and explain what each means. Use your Highway Code For Young Road Users to help you.
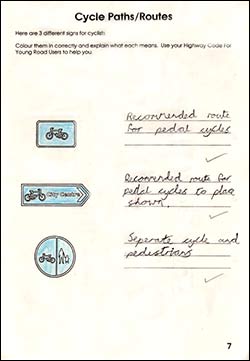 |
Recommended route for pedal cyclists
|
| Recommended route forpedal cyclists to place shown |
Separate cycle and pedestrians
|
| Page from the work book about signs for cyclists |
|
Traffic Lights
Using your Highway Code, colour in these lights in the correct sequence. In your own words write down what each set means.
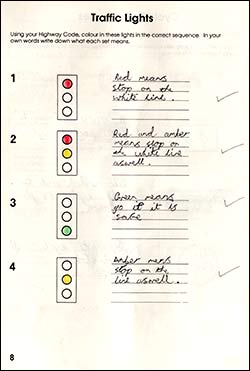 |
1 Red means stop on the white line
|
2 Red and amber mean stop on the white line as well
|
3 Green means go if it is safe
|
4 Amber means stop on the white line as well
|
|
Page from the work book about traffic lights
|
|
Riding Along
There are a number of things which you must not do when riding your bicycle as shown in the pictures below. Write down the advice you would give to each of these cyclists. You will find the information in your Highway Code for Young Road Users.
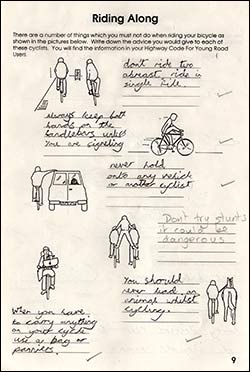 |
Don’t ride two abreast, ride in a single file
|
Always keep both hands on the handlebars unless you are signalling
|
Never hold on to any vehicle or another cyclist
|
Don’t try stunts, it could be dangerous
|
You should never lead an animal whilst cycling
|
When you have to carry anything on your cycle, use a bag or panniers
|
|
Page from the work book about how to ride along safely
|
|
Look and Signal
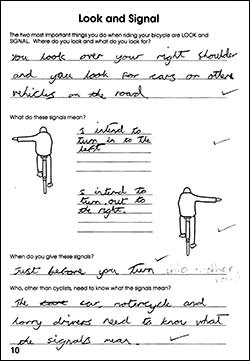 |
The two most important things you do when riding your bicycle are LOOK and SIGNAL.
Q Where do you look and what do you look for?
|
A You look over your right shoulder and you look for cars or other vehicles on the road.
|
Q What do these signals mean?
|
A I intend to turn in to the left
|
A I intend to turn out to the right
|
Q When do you give these signals?
|
A Just before you turn into another road
|
Q Who, other than other cyclists, need to know what these signals mean?
|
A The car, motorcycle and lorry drivers need to know what the signals mean.
|
|
Page from the work book about looking and signalling
|
|
Left Turn – Main Road to Side Road
On the road map draw a line to show where you would turn left and label it with the following numbers:
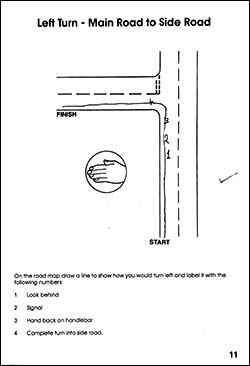 |
1 Look behind
|
2 Signal
|
3 Hand back on handlebar
|
4 Complete turn into side road
|
|
Page from the work book about turning left into a side road
|
|
Left Turn – Side Road to Main Road
On the road map draw a line to show how you would turn left and label it with the following numbers:
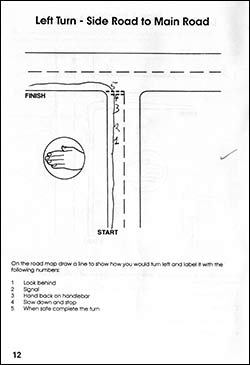 |
1 Look behind
|
2 Signal
|
3 Hand back on handlebar
|
4 Slow down and stop
|
5 When safe, complete the turn
|
|
Page from the work book showing how to turn left on to a main road
|
|
Overtaking
On the road map draw a line to show how you would overtake the parked car. Label the line with the following numbers:
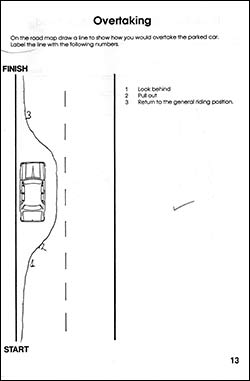 |
1 Look behind
|
2 Pull out
|
3 Return to the general riding position
|
|
Page from the work book showing how to overtake safely
|
|
Right Turn – Side Road to Main Road
On the road map draw a line to show how you would turn right and label it with the following numbers:
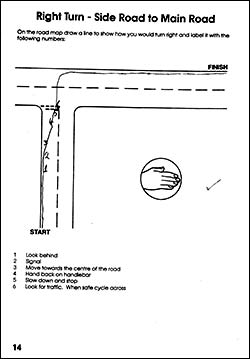 |
1 Look behind
|
2 Signal
|
3 Move towards the centre of the road
|
4 Hand back on handlebar
|
5 Slow down and stop
|
6 Look for traffic. When safe, cycle across
|
|
Page from the work book about turning right onto a main road
|
|
Right Turn – Main Road to Side Road
On the road map draw a line to show how you would turn right and label it with the following numbers:
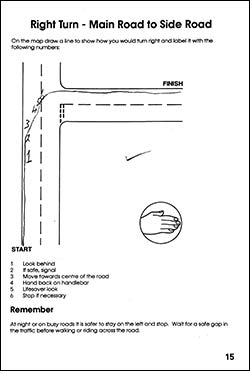 |
1 Look behind
|
2 If safe, signal
|
3 Move towards the centre of the road
|
4 Hand back on handlebar
|
5 Lifesaver look
|
| 6 Stop if necessary |
Remember
At night or on busy roads it is safer to stay on the left and stop.
Wait for a safe gap in the traffic before walking or riding across the road.
|
|
Page from the work book about turning right into a side road
|
|
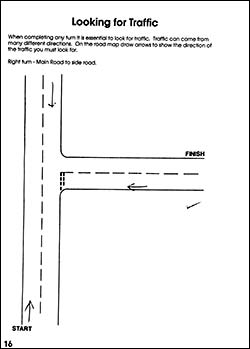
Looking for Traffic
When completing any turn it is essential to look for traffic. Traffic can come from many different directions. On the road map draw arrows to show the directions of the traffic you must look for.
 |
|
Page from the work book showing where to look for traffic
|
|